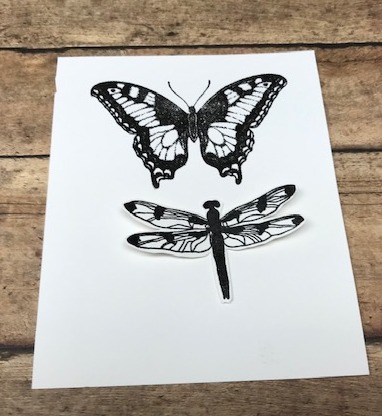
9901-L Butterfly Lg. and 4405-K Dragonfly Deco.


Let adhesive dry and on the outside (front) of the card you can use your sentiment - I used 5025-F With Deepest Sympathy on the first card and 1819-I Wishing you Happiness.

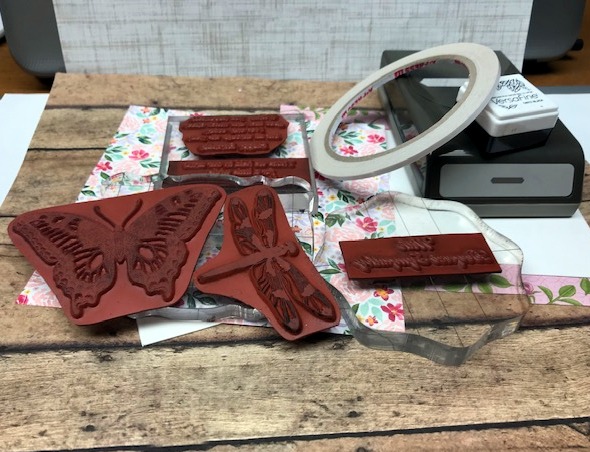
Supplies are: card stock, pretty floral paper will need 6 x 6 piece, punch, or craft knife to cut slit, scor-tape or heavy glue, card stock for butterfly and dragonfly.
I stamped and embossed the butterfly and dragonfly in black versafine ink and embossed with black embossing powder. I used 100# cardstock so my image would be more durable and interactive as the wings will be folded to go through the slit.

After embossing I let cool and then fussy cut the images out. I left a small white border around the images but that is strictly your choice.
Taking my 6 x 6 sheet of floral or pattern paper I cut 2 inch off first - then I cut a piece of remaining floral pattern to 4 x 5 1/4 and the 2 inch piece was trimmed to 4 1/4 in length.
I first taped/glued the 2 inch x 4 1/4 inch piece on the front of the card - measuring in 5/8 inch from the left side.

On the inside of the card I glued the 4 x 5 1/4 sheet of floral pattern on the bottom inside as shown.

Taking my punch, craft knife, or die cut a slit on the front two inch piece approx 3/8 to 1/2 wide and long enough to let your image slip through it comfortably. Make sure it is long enough to handle the length of your image.

Gently fold your image in half but do not score, just fold. Making sure your interactive image will fit comfortably in the slit. Apply scor-tape, red line tape or a strong liquid adhesive glue the image on the inside of the card, just using a strip of adhesive or glue down the middle. Leave wings loose. With the image (butterfly or dragonfly) on the outside and the middle (body) of the image in the slit adhere the image so that it will be glued or taped to the inside of the card. To send, fold up the wings and put them through the slot.


In the inside upper flap I presented my greeting - 4025-F Deepest Sympathy and I
used 4013-H Those we held on the inside. On my Dragonfly card I used
Now you can add any fun embellishments you wish to add, from bling, punched leaves, sequins, etc. on the outside of your card to make it really special. Hope you try this technique and have fun creating.


4 comments:
Awesome cards Shirley! Looking forward to making one!
Gorgeous card and design Shirley. Thanks for the tutorial..Loz
Wow! What a very clever idea here Shirley! I've not seen anything like this before, but it looks like I need to give it a try now! The insects are so pretty with that floral papers you've used! Wonderful tutorial and thanks for sharing!! HUGS
This cards turned out beautifully, Shirley! Your butterfly and dragonfly are beautiful, and I love the way they slip through the slot and hold the card closed. Your choice of DSP was perfect.
Post a Comment